
Saggar firing and pit firing supplies matter only when they work as a system, and that is exactly what this article breaks down.
If you are tired of unpredictable smoke patterns or warped trays pulling your pieces off course mid-fire, you are probably ready for tools that behave.
The corundum mullite setter tray handles the heat without bending, and the Saggar Firing in an Electric Kiln handbook gives you the slow ramp charts to avoid cracking.
Together, they protect your kiln’s elements and keep your surfaces rich and smoke kissed, batch after batch.
You will learn how their stackable design and step by step temperature guidance replace guesswork with controlled, repeatable results.
Let’s start with what each supply does on its own.
Quick Answer
- Use corundum mullite saggars rated to 1700°C for warp prevention.
- Choose compact, stackable saggar designs with open windows for smoke wrap.
- Ramp below 4°C/min under 1200°C and 3°C above to avoid thermal shock.
- Keep electric kilns under 1300°C with corundum-mullite refractories and dedicated power.
- Wear respirators and ventilate firing areas due to fumes and fine dust.
| Saggar Firing in an Electric Kiln: A Practical Handbook |  | Essential Guide | Purpose: Guide for saggar firing techniques | Type: Hardcover handbook (96 pages) | Material: Paper (printed) | SEARCH BEST PRICE | Read Our Analysis |
| Corundum Mullite Saggar Kiln Setter Tray (170x95x30mm) |  | Professional Grade | Purpose: Support for high-temperature firing/sintering | Type: Refractory ceramic kiln setter tray | Material: Corundum mullite refractory ceramic | SEARCH BEST PRICE | Read Our Analysis |
More Details on Our Top Picks
Saggar Firing in an Electric Kiln: A Practical Handbook
If you’re stuck with an electric kiln, this 96-page handbook is an indispensable guide for the home studio potter. From Schiffer Craft, hardcover, published November 2021, it tackles saggar firing wrapping pots in combustibles inside a sealed container without gas. Smart.
This book is best for a beginner who owns an electric kiln and wants to move beyond plain bisque and glaze work. Its one clear strength is the repeatable process for a technique that most potters only see in pit firing videos. The honest drawback is that saggar firing creates fumes, so you still need a ventilated firing area and must read your kiln’s manual for safe venting. It differs from the other products here because it focuses on a contained method, not open-air smoke firing on a wheel or in a backyard.
You’ll get step-by-step processes, troubleshooting for cracked wares, and material lists for clay bodies and combustible wraps. No fluff, just usable method for your home studio. Honestly, it’s the line between guessing and nailing a cone 6 bisque schedule with a saggar inside. The hardback binding survives your chaotic shelf, unlike a spiral notebook of scribbled notes.
- Purpose:Guide for saggar firing techniques
- Type:Hardcover handbook (96 pages)
- Material:Paper (printed)
- Compatibility:Electric kilns
- Brand:Schiffer Craft
- Physical Specs:96 pages (hardcover)
- Additional Feature:Published November 2021
- Additional Feature:Compact 96-page guide
- Additional Feature:Hardcover reference edition
Corundum Mullite Saggar Kiln Setter Tray (170x95x30mm)
This tray suits a home studio potter who fires technical ceramics like zirconia components and needs a dependable kiln furniture solution. Its main strength is the corundum mullite body, which handles heat up to 1700°C without warping or reacting with your work. Unlike basic cordierite shelves, this setter is built for repeated high-temperature cycles, so you can trust it for demanding firings.
The honest drawback is its sensitivity to thermal shock, so you must follow slow ramp rates to avoid cracks. Keep temperature changes under 4°C per minute below 1200°C and reduce that to 3°C above that point, especially for larger pieces. This is more careful than what you would need with a standard kiln shelf, but the trade-off is a stable, flat surface for sintering.
What sets this tray apart from other setters is its stackable design, which lets you organize multiple layers inside your kiln without taking up extra floor space. The compact 170x95x30mm size fits neatly on a kiln shelf, and its model number is VUSSASAKS-12F43CC6. It works well for bisque or glaze firings in a small electric kiln, but remember to avoid rapid temperature swings by ramping slowly.
For a beginner, this tray is straightforward: place your pieces on it, fire, and let it cool naturally. The main thing to remember is to preheat the kiln gently and never pull the tray out while it is hot. If you fire zirconia or other technical bits, this setter keeps your kiln organized and your pieces stable, so you can focus on the clay body and glaze rather than worrying about cracked supports.
- Purpose:Support for high-temperature firing/sintering
- Type:Refractory ceramic kiln setter tray
- Material:Corundum mullite refractory ceramic
- Compatibility:Laboratory furnaces, industrial kilns
- Brand:AZYXLLDM
- Physical Specs:170x95x30mm
- Additional Feature:Temperature change limits
- Additional Feature:Maximum 1700°C usage
- Additional Feature:Stackable for efficient loading
Factors to Consider When Choosing Pit Firing and Saggar Firing Supplies
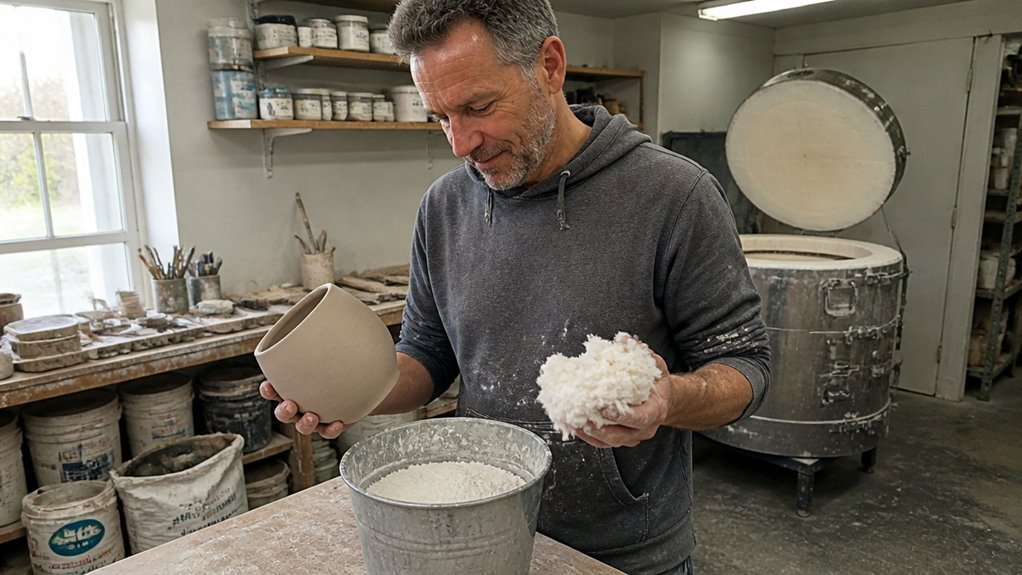
Choosing the right refractory for pit or saggar firing comes down to five factors. Material compatibility, thermal rating, size, kiln type, and durability each play a role in whether your work survives the process.
First, check chemical stability. The refractory must not react with your clays or glazes during firing. A mismatch can leave contamination on your pieces.
Next, confirm the thermal rating. The material needs to handle your maximum firing temperature without warping or cracking. If it fails, you will be pulling broken shards from your bisque.
Size and shape matter too. Measure your kiln’s interior and the footprint of your vessel before buying. A tray that fits a gas kiln may crowd an electric one.
Consider your firing setup. Electric, gas, and open fire environments place different stresses on refractory materials. Choose a product meant for your specific kiln type.
Finally, think about durability. How many firing cycles do you need before the tray or shelf crumbles? Cheaper materials often degrade fast, so plan for replacement.
Material Compatibility
Choosing materials for pit and saggar firing is a chemistry and failure avoidance exercise. Corundum mullite is a tough refractory ceramic that handles thermal shock up to 1700°C. Metal and low-fire clay melt or fatigue quickly, so leave them out.
Match the material’s thermal expansion to your kiln’s ramp. Keep the ramp under 4°C/min below 1200°C, then drop to 3°C/min above that. This prevents cracking.
Avoid reactive containers. Sawdust or salts should not chemically alter your clay during firing. Choose ware with dimensional stability, since warping brings contamination and uneven heat.
Pick stable, non-reactive, high-temperature ware. Your pots will survive, and you will not be picking shards out of your hair.
Thermal Ratings
Thermal ratings trip up a lot of potters, but getting them right saves you from replacing saggar materials mid-season.
For electric kilns, plan for sustained temperatures between 1000°C and 1300°C during saggar work.
If you fire stoneware or porcelain, which vitrify hotter than earthenware, choose ratings above 1400°C without exception.
Thermal shock deserves attention too. Rapid heating wrecks corundum mullite, so check ramp rates and keep them at or below 4°C/min below 1200°C.
Above 1200°C, slow down to 3°C/min or less.
Pick saggar materials rated for at least 1700°C to give yourself a safety margin.
That cushion prevents deformation and spalling across repeated firings.
Overheat past the limit, and you will see cracking or worse.
Match the rating to your actual firing schedule, and you will avoid early replacements.
Size and Shape
Geometry dictates how easily your kiln loads or how evenly smoke wraps your pots. Match your saggar’s footprint to your kiln’s floor, and you won’t overthink it.
Raised-wall trays with open windows let smoke wrap wares. Flat stackable designs maximize volume.
Larger saggars handle shell-like parts or many small pots. Compact rectangles fit tight layouts.
A 170 x 95 x 30 mm ratio nests pieces well. Taller walls spike temperature gradients.
For pit firing, match your sawdust packs and salt containers to the pit’s floor. Otherwise, you’ll get uneven ember contact.
Square or rectangular saggars pack tighter in rectangular chambers. Round forms dodge corner heat sinks.
Pros include efficient packing and airflow. Cons include uneven heat from tall walls.
Measure your kiln floor first. Then pick a shape that packs flat.
Kiln Type Fit
Your kiln’s chamber size and heating curve are the real gatekeepers for saggar work. Electric kilns work well for saggar, but they stay below 1300°C unless you install high-alumina or corundum-mullite refractories rated up to 1700°C.
Measure your chamber first, or your saggar won’t fit with room to expand during firing. For the heating curve, hold to 4°C/min or less below 1200°C, then drop to 3°C/min or less above that. Faster ramps will crack your trays sooner than you can replace them.
Pit firing is out for electric kilns. Open flames and smoke will ruin your elements, and an electric kiln cannot produce the reducing atmosphere that pit firing needs. That requires a gas kiln.
Match your saggar to your electric kiln’s limits, or plan on buying a dedicated gas rig.
Durability Needs
Most saggar durability problems come down to thermal shock: the sudden crack when temperatures shift faster than the refractory can handle.
Corundum mullite, a tough high-alumina refractory, handles swings up to 4°C per minute below 1200°C and 3°C above.
Check that its continuous rating reaches 1700°C or more, or you risk warping mid-batch.
Complex shapes like raised walls or open windows are fragile, so they need a slower 1–2°C per minute during heat-up; that’s a ramp-rate issue, not a durability flaw.
Demand oxidation resistance and chemical resilience for your kiln’s atmosphere, especially in electric kilns where controlled firing profiles extend service life.
Even top-grade refractories will crack if you cool them too fast, so plan your cooling just like you would a glaze soak.
Heating Ramp Rates
Controlled heating ramp rates prevent thermal shock, which cracks both your ware and the saggar.
Keep the ramp at or below 4°C per minute up to 1200°C, then reduce it to 3°C per minute above that temperature.
Heavier saggar walls need a slower rise of 1–2°C per minute, or internal stress fractures can form.
Pit firing is less precise, but aim for a steady 50–100°C per hour to get consistent reduction.
Rapid cooling is just as risky; cooling faster than 5°C per minute causes dunting, which is a type of cracking.
Choose supplies that include clear ramp guidance in their instructions.
Without those guidelines, you risk turning your work into a smoking crater instead of finished pottery.
Usage Environment
A well-ventilated, fire-resistant area is your first requirement for pit or saggar firing. Use a stable, level floor, because the kiln gets heavy and a wobble mid-fire is dangerous.
High ambient humidity means longer pre-firing conditioning for saggar materials and greenware. Otherwise, steam can crack your pots.
Plan for smoke and particulates from organic matter with exhaust or by working outdoors. For electric kilns, use a dedicated, properly rated power supply and follow the manufacturer’s instructions for wiring.
Overloading circuits with auxiliary heaters is a common mistake. Wear heat-resistant gloves and a respirator for fine dust.
Check your space, humidity, power, and protection before you spend any money.
Stacking Design
The design of your saggars controls load efficiency and surface quality. Get it wrong, and you face cracked pots and uneven reduction.
Use stackable designs with raised walls and open windows. This lets you load tightly without pieces touching, which is a game-changer.
Corundum mullite saggars hold their shape batch after batch. Your geometry stays true, so you can rely on the same fit every firing.
Size your saggars to clear your tallest ware. The footprint should match your kiln shelf, because overhanging causes uneven heat.
Use tight-fitting lids or interlocking rims. They seal in the reduction atmosphere that creates those rich surface colors.
Control your temperature ramps carefully. Below 1200°C, heat at 4°C per minute; above that, drop to 3°C per minute. Your saggars will last longer without cracking.
Measure twice, fire carefully.

Blocks fumes and fine dust so you can fire saggar pieces safely.

Monitors ramp rates precisely to prevent thermal shock and cracked ware.

Protects kiln shelves from drips and makes cleanup fast and easy.
See today's best deals onKiln Accessories
Frequently Asked Questions
Can I Reuse Saggar Materials After Firing?
Yes, you can reuse saggar materials after firing, but don’t assume they’re ready for another run without a close look. Check each piece for cracks, spent combustibles, or contamination that could ruin your next batch.
Sieve out any debris and refresh the mix with about 20 percent new combustible material, like dried leaves or sawdust, to keep the reduction consistent. Test a small sample tile first to confirm the surface effects match what you expect.
If you notice any glaze drips or metal residue, discard those pieces entirely, as they can cause uneven burning or unwanted marks. Store your reusable saggar materials in a dry, sealed container between firings to prevent moisture absorption.
For health worries, such as inhaling dusty residue, wear a mask and work in a ventilated area, and check with a vet if your pet ingests any fired material. In my experience, cleaning and reusing works well, but always prioritize safety and thorough testing.
What Safety Gear Is Needed for Pit Firing?
For pit firing, you need protective gear that shields you from heat, ash, and fumes. Wear thick leather gloves, safety goggles, a respirator rated for particulates, and a leather apron over long sleeves. Closed-toe boots and a face shield are essential for sparks and debris. When you lift hot pottery, use tongs or heat-resistant mitts, not just gloves, to avoid burns. Your skin and lungs are not expendable, so check your respirator’s seal before each firing. A concrete tip: soak your apron and gloves in water before approaching the kiln, as moisture delays heat transfer. For related safety practices, search “high temperature kiln handling” to learn more. If you feel dizzy or have breathing trouble, stop and step away, then check with a vet if your pet ever ingests ash fragments.
How Do I Prevent Cracking in Thick Pottery?
To prevent cracking in thick pottery, dry slowly and evenly by covering the piece with plastic, then gradually exposing it to air over several days.
You must also wedge your clay thoroughly to remove trapped air pockets, and compress the walls while throwing to align the particles.
Fire the piece low and slow, using a ramp that lets heat penetrate evenly, which avoids thermal shock cracks.
One concrete tip: wrap the pot in a plastic bag and poke a single pencil hole, then widen the hole every 12 hours over a week.
For extra safety, bisque fire to cone 04 with a 30 minute hold at the end. If you notice any hairline fractures after the first firing, check your kiln’s cooling rate or consult your local clay supplier for a slower schedule.
Do Saggars Work in Gas or Wood Kilns?
Yes, saggars work in both gas and wood kilns, so you are not locked into one firing method. They perform reliably with any flame source, including electric, as long as you manage the heat flow.
For wood kilns, position each saggar so it is not in the direct path of the flame blast. That simple shielding prevents thermal shock and uneven reduction, which can crack your pieces.
For gas kilns, place saggars on kiln shelves with at least a finger’s width between them. This allows the atmosphere to circulate evenly, which boosts the smoky surface effects you want.
One concrete tip: fire your saggars with a slow ramp up, around 150°F per hour, until you pass 1000°F. This protects them from stress and improves the clay bodies inside.
Related to this, kiln furniture like stilts or props can help you stack saggars securely without blocking vents. If you notice any cracks after firing, check your cooling rate next time.
For health concerns with glaze fumes, always ventilate your kiln area. When in doubt about firing schedules, check with your kiln manufacturer or a local potter.
What Organic Matter Gives Best Color Results?
Banana peels and seaweed give the most vivid color results, but horsehair creates striking carbon trails worth trying. Cobalt-rich seaweed shifts toward blues, while copper-laced leaves produce greens. The key is to test small batches first, because your kiln’s atmosphere changes everything. Start with a 10 percent mix of dried seaweed in your clay body and fire a few test tiles before committing. Search for “natural ash glazes” to find more ratio ideas. In my experience, patience with small tests beats guessing every time. For health worries about any additives, check with your vet before using them around your pet.
Rounding Up
The corundum mullite tray is the supply that answers your firing needs.
For your next load, use that tray at 1200°C and keep the ramp rate slow, because fast heat cracks everything.
Check your stacking like a game of Tetris, not Jenga, to avoid uneven pressure in the kiln.
Write down your plan to fire at cone 6, and trust that your electric kiln can handle the saggar shuffle with the handbook’s guidance.
One measurement to hold onto: the tray’s ~$20 cost beats a $40 shelf replacement any day.
The ultimate advice is simple: don’t overthink it, your kiln’s got this.