
Firing a pottery kiln for the first time means following five controlled steps: prep, load, cone, fire, and cool. If you are standing in your studio with a fresh batch of bone-dry pots, you are likely wondering how to avoid cracks, glaze runs, or a kiln that just won’t reach temperature.
This guide walks you through each of those stages, from pulling the kiln away from the wall and cleaning the element grooves to matching the right cone to your clay body and timing the full 7.5 hour cycle. I learned early that skipping the preheat or unloading too soon can ruin a whole shelf of work, so I keep things simple and practical.
We will cover washing shelves thin, leaving proper lid clearance, and why moisture in your ware is a deal breaker. You will also get the scoop on closing peep holes, cooling below 125°F to avoid crazing, and logging your results for next time.
Start with the prep step, where a clean kiln and safe placement set the tone for everything that follows.
Quick Answer
- Prepare the kiln by vacuuming elements, pulling away from walls, and installing a surge protector.
- Load only bone-dry ware with a cool cheek test and at least 1/4 inch spacing.
- Choose a firing cone matched to clay and glaze, with the sitter cone one number higher.
- Fire about 7.5 hours, keeping peep plugs open during preheat and closed before ramp-up.
- Cool below 125°F before opening, then unload top shelf down and log the date, cone, and load notes.
Prep Kiln Safely: Setback, Vacuum, and Wash Shelves
Pull the kiln 12 inches away from any combustible wall before firing. Vacuum every element groove so leftover clay bits do not cause element wear or hot spots.
Check the thermocouple placement. It should sit proud, not buried, to read temperature accurately.
Make sure the thermocouple sits proud, not buried, so the temperature reading is actually accurate.
Install a dedicated surge protector for the control board. A fried board is a pricey mistake.
Wash the shelves thin, about 1/16 inch, so glaze drips pop off later. Leave the peep plugs open during preheat so damp air can escape.
Twenty minutes of fussy prep saves you from a ruined load and a hefty repair bill. Your future self will thank you.
Load a Kiln for Bisque and Glaze Firings

Loading a kiln is where pottery dreams either thrive or shatter, so the rules matter. For bisque firings, bone-dry greenware can touch and even stack. That feels wonderfully reckless but is perfectly safe.
Glaze firings demand more respect. Every piece needs at least a quarter-inch of breathing room so melted glazes don’t weld your mug to its neighbor.
Bisque Loading Basics
Bisque firing is the pottery equivalent of a dry run. Nothing melts, nothing glazes, and your main job is to get every piece bone-dry and safely crammed in.
Kiln stacking for bisque is forgiving. Greenware can touch or even nest, unlike glazeware.
Never load wet ware. Moisture turns to steam, and steam explodes pots.
Make certain every piece passes the “cool cheek” test. If it feels damp against your face, it’s not ready.
Place shortest pieces on the bottom shelf to keep tall posts stable. Distribute mass evenly.
Keep 2 inches from the lid, 1 inch from walls, and 2 inches from the thermocouple.
Bottom shelf sits on three posts for airflow. Cram it tight, but don’t be reckless.
Your only job is to get everything dry, safely. Done right, bisque is a breeze.
Glaze Ware Clearance Rules
Glaze firing changes everything. Clearance is your top priority because glaze expands, drips, and shifts pieces during the firing.
Glaze expansion makes clay bodies grow and stick, so shelf spacing needs at least 1/4 inch between items. Use 1/2 inch for safer drip avoidance.
Ware shift happens when kiln posts slip. Check post spacing and press contact points firmly before firing.
Cone fit controls glaze melt. If the glaze runs too much, you get pooling disasters on the shelves below.
| Distance | Minimum | Why It Matters |
|---|---|---|
| Piece to piece | 1/4″ | Prevents surface touch sticking |
| Piece to shelf | 1/2″ | Leaves room for glaze runs |
| Piece to wall | 1″ | Allows even heat flow |
| Shelf to shelf | 3″ | Guarantees load density balance |
| Lid to top | 2″ | Stops over-fire marks |
Load density favors fewer, taller stacks over tight clusters. Check every gap twice, then fire with confidence. A stuck shelf is a sad shelf.
Match Kiln Firing Cone to Your Clay and Glaze
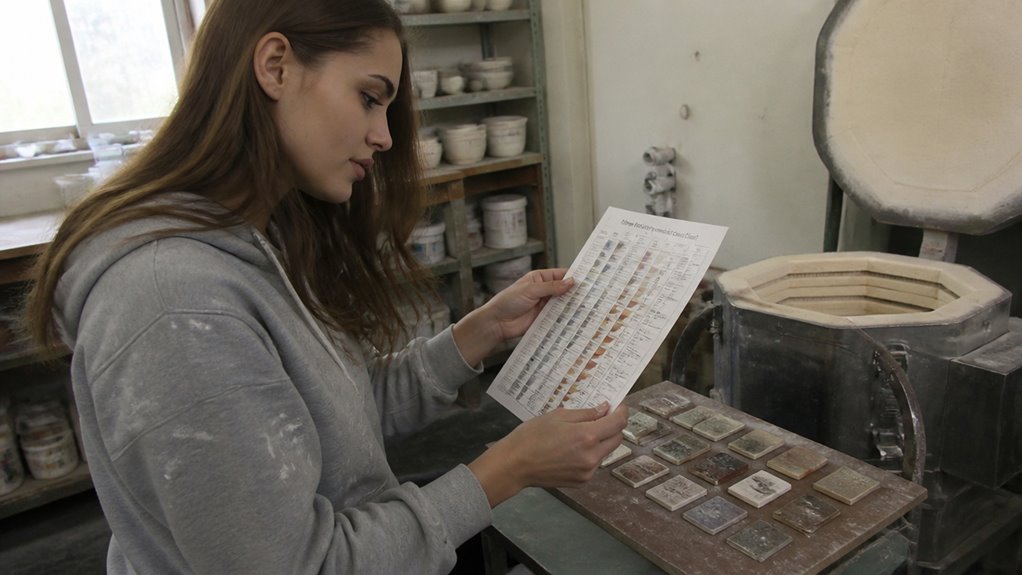
Matching the firing cone to your clay and glaze is the most important decision you make before turning on the kiln, and it’s one potters often get wrong. The cone isn’t just a number; it’s a measure of heat work, combining temperature and time.
Matching your firing cone to clay and glaze is the biggest decision before you turn on the kiln—and it’s one potters often get wrong.
Cone chemistry drives the melt, and glaze behavior changes wildly between ranges. Low-fire clay at cone 06 won’t vitrify at cone 6; it will slump like a sad pancake.
Check glaze fit. A glaze matched to cone 5 will run off at cone 10, leaving your kiln shelf covered in mess.
Buy a cone pack for your target range. Witness cones verify the truth of your firing, so you don’t have to guess.
Set the Kiln Sitter, Timer, and Digital Program
Setting the Kiln Sitter means choosing a cone one number hotter than your target, because the cone bends and trips the switch just after your clay matures. This works well, but only if you trust the cone.
Digital models skip the bar cone entirely. They still need witness cones on the shelves, placed top and bottom, to confirm the program actually did its job.
For the timer, aim for 8 to 9 hours total. If the firing runs past 8.5 hours, that is a red flag that your elements are getting tired, not a sign to wait longer.
Check the elements if you see this slowdown. A fresh set should fire closer to the low end of that range.
Kiln Sitter Cone Selection
A kiln sitter cone is a small pyrometric cone that bends and trips a switch to shut off your kiln at the right moment. Choosing the wrong one leaves you with wasted heat and a failed firing.
Pick a cone one number higher than your target. For a cone 6 firing, use cone 7 in the sitter.
Match the cone’s shape and size exactly to your kiln model. Sitter cones are not universal, so check your manual.
Place witness cones on the top and bottom shelves to verify the firing. The sitter does the work, but witnesses tell you what actually happened.
Cone bending is slow and predictable. A cracked or old cone bends early and can ruin a load.
Trust the mechanical brain, but verify with witnesses. Your kiln will not tell you when it is wrong.
Sitter cones cost about four dollars each, so buy spares. A missed firing costs far more than a spare cone.
Digital Program & Timer Setup
The sitter cone handles the mechanical shutoff, but the digital program controls the heat work. For timer setup, select a firing schedule, such as medium for bisque or slow for thick pieces.
The program manages the temperature ramp, climbing heat gradually instead of all at once. Most digital kilns have built-in schedules, so you choose one and set the cone number.
Set the timer for around eight hours, though thick work may need nine. A standard load finishing under 7.5 hours is great.
If it runs over 8.5 hours, your elements might be tired, much like you after loading shelves. When done, the display shows “CPLt,” but let the kiln cool before peeking.
Trust the program, yet still place witness cones. They don’t lie, even when the kiln does.
Monitor Kiln Firing: Close Peep Holes and Decode Errors
Two peep holes need attention during firing: one for watching dampness escape, one for ignoring until the kiln sitter drops. Keep them open during preheat, then shut them tight before ramp-up, or heat loss wrecks your schedule.
Watch for steam or water vapor at the peep hole. If it puffs out, moisture is still burning, so close the hole only when the air runs dry.
Check the digital display for error codes. These codes are not cryptic curses, just kiln whispers.
Memorize the common meanings. “Err” often signals thermocouple trouble, and “oPt” means a program glitch, so jot them down for the technician.
Decoding errors beats guessing. Write each code, note the firing hour, and stay calm.
A kiln is stubborn, not malicious. Track it, close those plugs, and let the clay body cook.
Expect 7.5-Hour Firings: Diagnose 8.5+ Hour Runs
Standard firings should clock in around 7.5 hours for most loads. When that runtime stretches past 8.5 hours, something’s off, and it’s usually not the clay.
That extra hour points to element wear: the slow degradation of your kiln’s heating coils. They still work, just slower, like tired oven burners.
A creeping firing duration is your first red flag. Check your digital controller’s log or kiln sitter timer.
If you’re consistently hitting 8.5 hours, don’t ignore it. A quick resistance test or visual inspection of the coils reveals the culprit.
Replacing worn elements costs roughly $150–$300. That’s far cheaper than a ruined glaze batch.
Track your firing times weekly. Spot a pattern, then call a tech.
Otherwise, you’re just baking patience into every pot. Seven and a half hours is your sweet spot; anything longer means maintenance time.
Cool Below 125°F Before Opening to Prevent Glaze Crazing
Check the controller display, not a timer. Room temperature changes how fast the kiln cools.
Cooling below 125°F before opening prevents glaze crazing. Those spiderweb cracks come from thermal shock when the kiln drops from peak temperature too quickly.
After firing wraps up, patience is the real tool. Let the kiln’s internal temperature equalize naturally, and keep the lid closed until the controller reads below 125°F (about 51°C).
Opening early, even at 200°F, risks tiny fissures in the glaze. Those micro-cracks can harbor bacteria and ruin the piece for food use.
Leave the peep plugs in place until you hit the 125°F threshold. Then crack the lid an inch to let remaining heat escape.
Budget 8–12 hours for cooling. Overnight is typical, and it gives you peace of mind.
Wait it out, or you’ll be re-firing regret. Your glaze’s survival depends on this timing.
Unload Top-to-Bottom, Sweep Fragments, and Log Firing Notes
Every unloading session starts with a simple rule: work from the top shelf down, one layer at a time. This prevents tall pieces from toppling when you shift lower shelves, and it lets you greet the kiln scent, that warm, dusty clay aroma, like an old friend.
Work top shelf down, one layer at a time, and greet the kiln’s warm, dusty scent.
Ignore firing myths about “letting it breathe” by opening the lid an inch. That just invites thermal shock.
Sweep any exploded fragments from the element grooves with a soft brush. Stray bits can melt onto coils and burn them out, costing you a $200 element replacement.
Then log your notes: date, cone, load size, and any oddities like a tilted witness cone. That record is your best teacher.
Do this, and the next firing gets easier, every single time.
Frequently Asked Questions
What if My Kiln Is in a Garage With Concrete Floors?
Yes, a garage with concrete floors is fine for a kiln, as long as you take a few safety steps. The floor itself is non-combustible, which is good, but concrete holds dampness from the ground, especially in wet seasons.
Set your kiln on a stable, heat-resistant base that lifts it slightly off the concrete, such as firebricks or a ceramic fiber board. This promotes airflow underneath and prevents moisture from wicking up into the kiln, which can cause uneven heating or cracking during firing.
Keep the kiln at least 12 inches from any wall, and ensure that area is clear of clutter, tools, or combustible materials. Airflow around the kiln is essential for both safety and even temperature distribution.
Check your kiln manufacturer’s instructions for the minimum clearance and base requirements, as these can vary by model. If your garage is attached to your house, also consider adding a carbon monoxide detector for extra peace of mind.
Monitor the concrete for any signs of dampness before firing, especially after rain. If the floor feels cool or clammy, delay firing until it dries out, or use a dehumidifier in the garage for a day beforehand. This simple step can save you from cracked pots and frustration.
How Do I Know When My Clay Is Completely Dry?
You know your clay is completely dry when it passes the moisture test and its weight stays steady. Hold the piece to your cheek: if it feels cool, dampness is still present, so wait longer.
Weigh the piece daily on a kitchen scale. Once the numbers stop changing for two days in a row, all free water has evaporated, and the clay is bone dry.
For a quick, hands-on tip, place a small mirror against the surface. If fog forms, it is still releasing moisture, so give it another day.
This state, often called leatherhard to bone dry transition, is your greenware’s final stage before firing. Always check your clay manufacturer’s drying guidelines, as thicker walls or humid rooms slow the process.
Only load the kiln when you are certain, because trapped steam can cause explosions. In my experience, a consistent weight over 48 hours is the safest proof.
Can I Mix Different Clay Bodies in One Firing?
Yes, you can mix different clay bodies in one firing, but you must always fire to the requirements of the most sensitive clay in the load. This usually means the lowest mature temperature, which prevents overfiring and warping.
Check the manufacturer’s instructions for each clay’s cone rating and your glaze fit. Place similar clays on the same shelf, keeping porous bodies away from direct flame paths.
Monitor your kiln atmosphere closely, as reduction can affect varied bodies unevenly. For mixed loads, fire slowly through quartz inversion around 1063°F (573°C) to reduce thermal shock risk.
Use kiln furniture and wadding to separate incompatible clays, and always test a small sample first. In my experience, a slow bisque and a careful glaze soak give the best co-firing results.
What Happens if I Forget to Place Witness Cones?
Forgetting to place witness cones means you lose the only independent proof of what actually happened inside the kiln during the firing. Without them, you cannot verify that your kiln reached the intended temperature or followed the correct schedule, so your results are left to guesswork and your ware may end up underfired, overfired, or with unpredictable glaze surfaces.
To avoid this, make it a habit to place a cone in every firing, even a fast bisque, and position it where you can see it through a spy hole. If you open the kiln and the cone is not bent as expected, check your clay and glaze manufacturer’s instructions to assess the exact deviation and adjust your next firing. This simple step turns a mystery into a measurable, fixable event, and it helps you trust your kiln’s controller over time.
Why Do My Glazes Look Dull After Firing?
Your glazes look dull after firing mainly due to a too-fast cooling rate or an underfired glaze chemistry. The key is to let the kiln cool slowly, especially in the last 200°F, so the surface can form a proper gloss.
If you usually open the kiln while it is still hot, try waiting until it drops below 150°F to prevent that matte, lackluster finish. Slow cooling also encourages crystal growth, which can enhance depth and shine.
Check your firing schedule against the clay and glaze manufacturer’s instructions, since each recipe has an ideal maturation window. In my experience, adding a 30-minute soak at peak temperature helps the glaze fully melt for a smoother result.
If the dullness persists, test a lighter application or adjust silica and alumina levels. A related term to search is “glaze crazing,” which often happens alongside poor surface gloss.
Rounding Up
To fire a pottery kiln for the first time, follow the step by step sequence and respect the heat. Check everything twice, then once more, because glaze crazing punishes hurry.
Keep notes on every firing, and keep your shelves clean. Test your cone math honestly, since the 125°F cooldown feels endless.
Do not crack the lid early, as that is a rookie’s regret. Write down your schedule, compare each reading, and ask yourself if you have been patient and predictable.
Be a little paranoid, but let your pots survive your first, fumbling waltz. The heat rewards those who move slow.