
If your kiln is not reaching temperature, the problem usually sits in one of a few key areas that you can pinpoint yourself. You are likely mid-project, with bisque or glazed ware cooling too slowly or never maturing, and that wasted time and electricity is frustrating. This guide covers the usual culprits, including worn elements, electrical issues, thermocouple problems, and heat escape routes like lid gaps or tight shelving.
In my own studio, I have chased a stalled firing more than once, and the fix was rarely what I guessed first. We will start with the most common cause, the heating elements, then move through the electrical checks and simple adjustments.
Let us begin with the elements, since they are the heart of your kiln’s heat.
Quick Answer
- Check element resistance with a multimeter; infinite readings mean broken elements.
- Verify breaker size and wiring gauge; undersized supply causes slow temperature crawl.
- Inspect relays for buzzing and tighten loose terminal connections to avoid hotspots.
- Replace degraded thermocouples when witness cones show under-firing despite display.
- Seal lid gaps and peepholes, and leave shelf clearance to prevent heat loss in your kiln.
Test Your Kiln Elements First: They Wear Out Most Often
Kiln elements wear out more often than any other component, and they are the easiest thing to check. Grab a multimeter, set it to ohms, and measure each element’s resistance.
Compare those numbers against resistance spec charts, which list healthy ranges for your model. If readings run 10-15% higher, efficiency drops fast.
A broken element reads infinite resistance, meaning zero continuity. You do not need to tear the kiln apart to test.
Unplug it, remove the element cover, and probe the terminals directly. Sagging coils, thin spots, or dark oxidation signal trouble even though numbers look passable.
A full set of elements costs $60-$150, whereas hours of chasing ghosts wastes time and firing costs. Test first, replace the bad ones, and watch the pyrometer climb again without surgery.
Resistance check beats guesswork every time.
Is a Tripped Breaker or Undersized Wiring Starving Your Kiln?
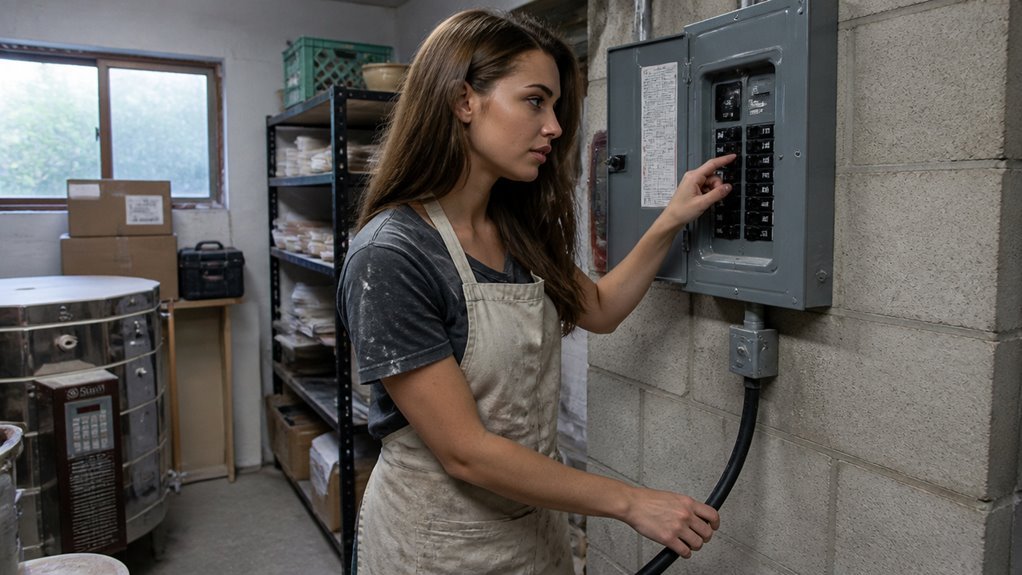
Check the electrical side before you blame the elements. When the kiln first kicks on, a tripped breaker or undersized wiring can starve it of power, making the temperature crawl. The math is simple: a 240V kiln pulling 40-50 amps needs a dedicated circuit sized to the data plate. If the breaker pops after a few minutes, that is your culprit.
Copper wire gauge matters too. Thin wire, like 10-gauge instead of 6-gauge, causes voltage drop. You will see a dull red glow instead of bright orange, and the kiln stalls.
Check the breaker first. It is a $15 fix, compared to a $300 element set. If it trips again, call an electrician. That is not a DIY job, trust me.
For wiring specifics, follow the manufacturer instructions and local electrical codes. A qualified professional should handle anything beyond a simple breaker swap.
Check Relays and Loose Connections Before Replacing Elements
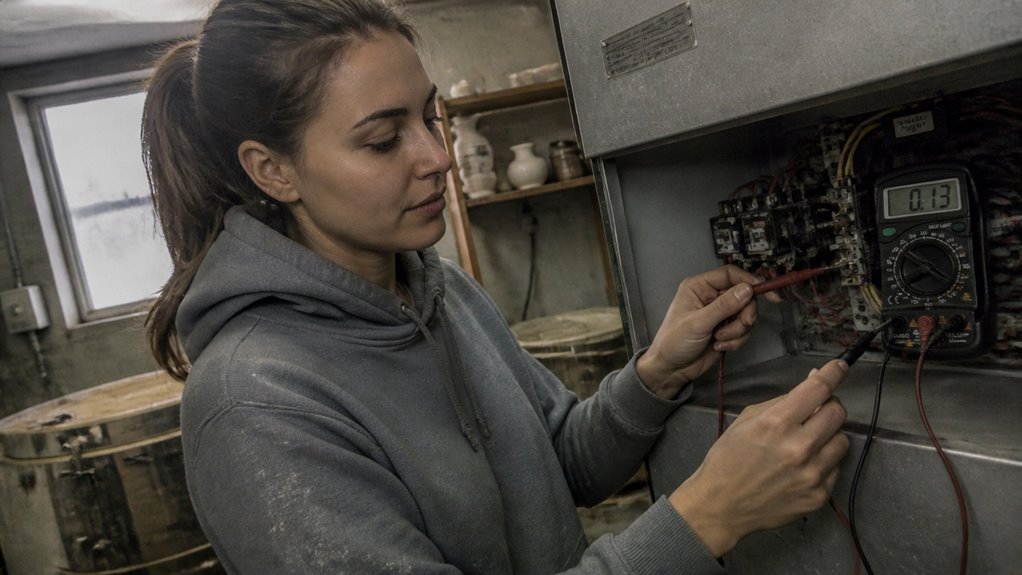
Electrical gremlins often hide between the breaker panel and the heating coils. Before ordering a $200 element set, test the relays and terminals with a $5 multimeter.
Relay chatter, that rapid clicking or buzzing, signals a failing relay that feeds power intermittently or not at all. That alone mimics a dead element perfectly.
Check terminal torque too. Loose nuts on element wires or relay lugs create high-resistance hotspots.
Those hotspots heat up, corrode, and eventually open the circuit, killing heat to that section. Snug them with a screwdriver, not a gorilla grip, because over-tightening strips threads.
If the element tests fine and connections feel solid, then suspect the coil. Verify upstream, replace downstream.
Is Your Thermocouple Lying About the Real Temperature?
A thermocouple is just a metal probe, and it lies when it degrades. If your controller reads 2232°F but your glaze is still gritty and under-melted, the sensor is the first thing to suspect, not the kiln elements.
Normal wear explains most failures. A thermocouple lasts roughly 50 Cone 6 firings, or about 150 Cone 04 firings. After that, vapor buildup shifts the alloy’s response and it reads false-high.
That false reading makes the controller shut off early. Your ware ends up 50–100°F short of where it needs to be.
Run a witness cone test to check the probe. Place a cone in the kiln, fire it, and compare the bend to what the display says. If the cone bends correctly but the screen disagrees, replace the thermocouple.
The replacement part costs around $20–$40. That is a cheap fix, and it beats chasing phantom electrical problems. Trust the cone over the screen, and change the probe when they disagree.
Inspect Lid Gaps and Peephole Plugs That Bleed Heat
A kiln that reads the right temperature but acts sluggish is likely bleeding heat through lid gaps or loose peephole plugs. These silent culprits force the elements to run longer, wasting energy and slowing your firing.
Start with a simple business card. Slide it around the lid seal and feel for drafts.
A 1/16-inch gap can add 30–45 minutes to a Cone 6 firing. Loose or missing plugs let cold air draft in, creating uneven chamber temperatures.
A thermal imaging scan will show glowing red seams around the lid and peepholes, pinpointing exact leak points. Tighten the lid latch, replace worn gaskets, and plug those holes properly.
It is a cheap fix that saves hours.
Adjust Shelf Clearance and Firing Load to Avoid Stalls
Adjust shelf clearance and firing load to prevent stalls. Tightly stacked shelves, especially thick stoneware, block radiant heat from reaching the center of the load. Leave one to two inches of clearance around each shelf.
Spread pieces evenly across the shelves instead of clustering them on one side. Poor heat distribution creates hot zones and cold spots, so the controller keeps firing but the cone never drops. Check your stacking before swapping parts.
Overloading mimics element wear because the kiln can’t push through the mass. A quick re-rack costs nothing, while a new element set runs $150 to $300.
Give the heat room to breathe and your kiln will finish the job.
Frequently Asked Questions
How Often Should Kiln Elements Be Replaced?
Kiln elements should typically be replaced every 100 to 200 firings, but the real clock is how they behave at high temperatures. You will know it is time when they look stretched, sag visibly, or the kiln struggles to reach your target temperature.
Check resistance with a multimeter once a year, comparing each element to the others. A reading that varies by more than 10 percent means that one is failing sooner than the rest.
For a quick habit, mark your firing log each time you unload the kiln, and inspect the coils monthly with a flashlight. If you notice hot spots or glowing unevenly, test the circuit right away.
The safest approach is to follow your kiln manufacturer’s replacement schedule, since firing temperature and frequency change wear rates dramatically. In my experience, cone 6 users replace elements less often than cone 10 potters who fire reduction regularly.
Remember to keep spare elements on hand, as waiting for shipping can stall a busy studio week.
Can a Faulty Safety Switch Stop a Firing?
Yes, a faulty safety switch can stop a firing prematurely, often before your kiln reaches the target temperature. Mechanical switches trip from sagged clay bars or weakened springs, while electrical issues like a faulty relay or bad thermocouple cause similar shutdowns. To avoid confusion, first check the safety switch itself: gently press the reset button and inspect for debris or warping. Then, test the thermocouple for continuity with a multimeter, as it is a common culprit. For a quick fix, clean the switch contacts with fine sandpaper and reseat the clay bar per the kiln manufacturer’s instructions. If the issue persists, review your kiln’s wiring diagram for locked rotors or thermal cutoffs. Always consult your manual before replacing parts. Search terms like “kiln cutoff diagnosis” can help you find more guidance.
Why Does My Kiln Click but Not Heat?
A clicking kiln that fails to heat usually means the relay is engaging, but power is not reaching the heating elements. Check the element continuity with a multimeter to spot any breaks, then examine the relay contacts for signs of pitting or wear.
If the elements test fine, verify the thermocouple calibration, as a faulty reading can falsely report temperature and cut the firing cycle early. A simple way to test is to compare the kiln’s display with a separate, known-good thermocouple at room temperature; a mismatch suggests the sensor needs replacement.
Loose wiring connections at the relay or element terminals are a common culprit. Tighten them carefully, and always consult your kiln manufacturer’s manual for the correct wiring diagram before deeper diagnosis. Search for the related term kiln element resistance to find more detailed troubleshooting guides.
Does Kiln Age Affect Firing Accuracy?
Yes, kiln age does affect firing accuracy, mainly because aging elements gradually increase their electrical resistance, which reduces heat output. This makes the kiln run slower, and the controller may still read the correct temperature while the ware actually gets underfired.
Thermoregulation drifts as relays, thermocouples, and wiring wear out over time. You can test this today by placing a cone pack near the center and edges of a shelf, then compare the bend to the kiln’s digital reading on a witness cone schedule.
Check your kiln manufacturer’s instructions for element replacement intervals, since resistance changes are the most common cause of drift. Searching for “kiln element wear symptoms” can also give you useful troubleshooting steps.
In my experience, replacing elements before they fail prevents most firing surprises. Keep a log of firing times and cone results to spot slow changes months before they ruin a glaze load.
Can Digital Controller Drift Be Fixed by Resetting?
Yes, a reset can temporarily clear digital controller drift, but it will not permanently fix it if the thermocouple has aged or the calibration has shifted.
The reset only wipes the error log and restores factory defaults, which does not correct the actual temperature mismatch inside the kiln.
For an accurate fix, use witness cones during a firing to verify the real chamber heat, then adjust the controller’s offset so its reading matches the cone result.
A practical tip: after any reset, always run a cone test before relying on your next glaze firing, and check the kiln manufacturer’s instructions for the correct offset range.
Thermocouple aging is often the hidden cause, so if offset adjustments no longer hold, replacing that sensor is the real cure, not another reset.
Rounding Up
Your kiln is not reaching temperature because of worn parts, loose wires, or a lying sensor, not some mystery.
Start by checking the elements in order, then test the relay for corrosion that adds resistance. Write down what you find, and compare the actual heat against what the sensor reports.
A corroded relay was the culprit in one case, and the fix cost $40, not a new kiln. Test the simple stuff first, since most problems are cheap to solve once you locate them.
Diagnose before you replace. That is the only way to keep your wallet and your sanity intact.