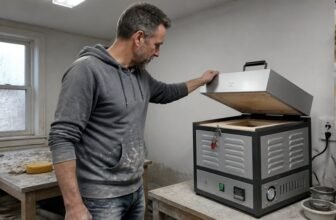
Choosing the right pottery kiln for your home studio comes down to matching voltage, chamber size, and firing temperature to the work you actually make.
You are probably looking at your tallest mug or widest platter right now, wondering if your current setup can handle it. This guide covers compact 120V options for stoneware and glass fusing, plus the high-power 240V units needed for porcelain.
It walks through temperature limits, electrical requirements, price ranges, and firing costs so you can compare realistically.
I have spent my share of evenings peeking through the peephole during a bisque fire, so I get the appeal of a dependable kiln. You will learn what each type can fire, how much it costs to run, and how to match the chamber to your pots.
Let us start with the basics of kiln voltage and what it means for your studio.

Compact 120V kiln fires to Cone 6 with a trusted digital controller.

Digital control up to 1200°C makes glaze firings accurate and repeatable.

High-fire 220V kiln reaches 1280°C for porcelain and dense ceramics.
Check discounted items inPottery Kilns
Quick Answer
- Compact 120V electric kilns fire to Cone 6 with digital controllers, no rewiring needed.
- PID controllers offer 1°C accuracy, auto shut-off, and over-temp alarms for safety.
- Standard 120V outlets let home studios run pro-grade kilns without electrician upgrades.
- Digital controllers with ramp and hold functions create custom glaze schedules.
- Small chambers suit test tiles, sculptures, and jewelry, matching home studio volumes.
| Large Microwave Kiln Kit for Glass Fusing |  | Best for Quick Projects | Max Temperature: High heat resistance (glass fusing range) | Power Source: Microwave | Control System: None (manual microwave) | SEARCH BEST PRICE | Read Our Analysis |
| WICAND Microwave Kiln for Pottery and Glass Fusing |  | Beginner-Friendly Choice | Max Temperature: Glass fusing range (not specified) | Power Source: Microwave | Control System: None (manual microwave) | SEARCH BEST PRICE | Read Our Analysis |
| Seattle Pottery Supply Electric Kiln 12×9 Cone 6 |  | Compact Workhorse | Max Temperature: Cone 6 (~2232°F) | Power Source: Electric (120V) | Control System: Bartlett V6CF digital controller | SEARCH BEST PRICE | Read Our Analysis |
| PYY Electric Kiln for Home Digital Temperature Control |  | Precision Digital Pick | Max Temperature: 1200°C (2200°F) | Power Source: Electric (1500W) | Control System: Digital controller (0–1200°C) | SEARCH BEST PRICE | Read Our Analysis |
| Seattle Pottery Supply 12×13 Electric Kiln Cone 6 |  | Space-Saving Option | Max Temperature: Cone 6 (~2232°F) | Power Source: Electric (120V) | Control System: Bartlett V6CF digital controller | SEARCH BEST PRICE | Read Our Analysis |
| Small 1200°C Electric Kiln for Home Pottery |  | Most User-Friendly | Max Temperature: 1200°C (2192°F) | Power Source: Electric (1500W) | Control System: Semi-Auto or Full-Auto digital panel | SEARCH BEST PRICE | Read Our Analysis |
| EQCOTWEA Electric Ceramic Kiln 4KW 1280°C |  | High-Fire Powerhouse | Max Temperature: 1280°C (working 1220°C) | Power Source: Electric (220V, 4KW) | Control System: Simple intuitive controls | SEARCH BEST PRICE | Read Our Analysis |
| PYY Electric Pottery Kiln with PID Controller |  | Best for Hobbyists | Max Temperature: 1200°C (2200°F) | Power Source: Electric (1500W) | Control System: PID controller with LCD display | SEARCH BEST PRICE | Read Our Analysis |
More Details on Our Top Picks
Large Microwave Kiln Kit for Glass Fusing
This microwave kiln kit suits beginners who want a quick, hands-on introduction to glass fusing without building a full studio. Its biggest strength is speed, cutting firing time down to minutes instead of the hours a standard kiln needs.
The kit includes a high-temp alumina silicate and ceramic fiber shell that fits most household microwaves, so you need no special tools or ventilation setup. Use the 50 fiber paper liners to protect the base from melted glass, which keeps your results clean and repeatable.
You can fuse glass cabochons, small pottery pieces, and enamel work, making it a safe pick for youth and adult beginners. It differs from a full-size kiln because it handles only small-scale projects, so don’t expect to fire a toilet or any large slab.
One honest limitation is that this kit does not reach the same cone range as a standard electric kiln, so your work stays limited to small, thin pieces. It also lacks temperature control, so you cannot program a ramp or soak, which matters for precise glaze development.
Instead of a kiln that requires a dedicated circuit and venting, this kit works in your kitchen microwave, which keeps your home studio footprint tiny. For a hobbyist who wants to test fused glass cabochons before investing in a bigger kiln, this is a practical starting point.
Compare it to a tabletop kiln: this microwave version fires faster but offers no digital controller and no room for taller pots. The ceramic fiber shell is lightweight and easy to store, while a standard kiln takes up permanent bench space.
You will still need to follow the manufacturer’s instructions for microwave wattage and firing times, since not every microwave heats evenly. The kit is best for small jewelry pieces or test tiles, not for functional ware that demands consistent firing curves.
For a home potter focused on enameling or small glass accents, this kit delivers accessible, compact fusing with a clear trade-off. You trade precision and capacity for speed and simplicity, which fits a beginner’s first foray into melting glass.
- Max Temperature:High heat resistance (glass fusing range)
- Power Source:Microwave
- Control System:None (manual microwave)
- Primary Application:Glass fusing, jewelry, melting
- Chamber Size:Outer approx. 7.5 × 4.3 in
- Safety Features:Thermal insulation; protective kiln paper liners
- Additional Feature:Fits standard microwaves
- Additional Feature:Includes 50 paper liners
- Additional Feature:No special tools needed
WICAND Microwave Kiln for Pottery and Glass Fusing
For hobbyists craving quick glass fusing without a full kiln, this is your beginner-friendly choice. You’ll pop a pendant into the WICAND’s 4.9-inch platform, hit the microwave, and in 6–8 minutes, you’ve got fused glass.
It’s that fast, and it suits a home studio where space is tight. This compact ceramic fiber wonder runs on standard 800W+ microwaves, so you don’t need a dedicated kiln room or a 240V outlet.
The WICAND shines for small jewelry pieces like earrings, pendants, and coasters, plus low-fire clay charms. Its honest drawback is the size limit: you can’t fire a stoneware mug or any piece larger than a few inches across.
Compared to a full electric kiln, it skips the long ramp-up and glaze firing schedule, but it also can’t reach the high cones needed for mid-fire stoneware.
Safety is simple: grab heat gloves and let the unit cool fully before opening the microwave door. Unlike a conventional kiln with a digital controller, this one relies on your home microwave’s timer, so watch the clock and never leave it unattended.
For a beginner who wants to test fused glass or bisque small porcelain charms, this is a gateway kiln that costs less than a standard tabletop model. For anyone planning larger batches or consistent glaze results, a proper kiln with a vent and kiln shelf remains the better fit.
The WICAND differs from other small kilns in its pure microwave dependency, which means no separate power cord or kiln furniture like posts and shelves. You only need a microwave-safe base, and the ceramic fiber holds heat briefly, so cooling is fast but still requires patience.
If you already own a wheel and throw small bowls, this won’t fire them, but it pairs nicely as a test kiln for glaze swatches on flat tiles. Grab it for fun, tiny projects, and keep your expectations set to single-layer fusing and low-fire clay.
- Max Temperature:Glass fusing range (not specified)
- Power Source:Microwave
- Control System:None (manual microwave)
- Primary Application:Glass fusing, low-fire clay, glaze
- Chamber Size:Outer dia. 7.5 × 3.3 in, platform 4.9 in
- Safety Features:Heat-resistant gloves recommended; cool completely before handling
- Additional Feature:6–8 minute fusing
- Additional Feature:Requires 800W microwave
- Additional Feature:Weighs ~1.5 kg
Seattle Pottery Supply Electric Kiln 12×9 Cone 6
Seattle Pottery Supply’s Electric Kiln 12×9 Cone 6 suits home potters who fire test tiles or small mugs and don’t want to rewire their garage. It runs on a standard 120V outlet, so you can plug it in and start bisque firing without an electrician.
The Bartlett V6CF digital controller gives you precise ramps and holds for custom glaze schedules, which is a clear strength for anyone experimenting with cone 6 clay bodies. The honest drawback is the 12×9 chamber, which limits you to a few small pieces per load, not production work.
It fires to cone 6, about 2232°F, matching most studio glazes, and the thermocouple sits offset for easy swaps. Built in the USA since 1975, it differs from bigger kilns by skipping 240V requirements and heavy ventilation setups.
Compared to a full-size kiln, this one trades batch size for convenience, making it a practical first kiln for a home studio. A standard home circuit handles it, and the digital controller keeps repeatable results, so your glaze tests stay consistent.
For a beginner who wants serious firing control without garage modifications, this is the compact option to consider. Just check the manufacturer’s manual for clearance and extension cord rules before you plug it in.
- Max Temperature:Cone 6 (~2232°F)
- Power Source:Electric (120V)
- Control System:Bartlett V6CF digital controller
- Primary Application:Pottery, test kiln, small pieces
- Chamber Size:12 × 9 in
- Safety Features:Thermocouple offset for easy, safe replacement
- Additional Feature:Made in USA
- Additional Feature:Easy thermocouple replacement
- Additional Feature:Requires 20 amp breaker
PYY Electric Kiln for Home Digital Temperature Control
Beginner jewelers and small-scale hobbyists will find the PYY Electric Kiln a precise digital pick for compact firing jobs.
Its 1500W system reaches 2200°F evenly, thanks to HRE and MO2 wires, and the digital controller sets temperatures to 1°C with a Type-K sensor that reads clearly.
The 150×150×140mm chamber suits small pottery, jewelry molds, and wax-casting bits, making it a good match for a home studio bench.
The top lid opens easily, and multiple vents plus a wax port simplify cleanup after burnout or glass fusing.
One clear strength is the safety package: timed shut-off, over-temp power-off, and UL certification give you peace of mind while you focus on the clay body.
An honest drawback is the small chamber, so you cannot fire larger bowls or tall vases, and the manual warns against exceeding 1200°C or overloading the space.
Unlike other kilns in this lineup, the PYY is built for tiny work like 3D resin burnout, not for bisque loads of full mugs.
For heat-treating small metal pieces or firing test tiles, it offers consistent results without taking over your studio.
Always check the manufacturer’s instructions for electrical hookup and ventilation, and call a qualified electrician if your outlet seems weak.
This kiln does not claim food safety for any glaze, so keep that in mind when you choose your finishes.
- Max Temperature:1200°C (2200°F)
- Power Source:Electric (1500W)
- Control System:Digital controller (0–1200°C)
- Primary Application:Pottery, glass fusing, jewelry
- Chamber Size:5.9 × 5.9 × 5.5 in (150 × 150 × 140 mm)
- Safety Features:UL certified; auto shut-off; over-temp protection
- Additional Feature:HRE/MO2 heating elements
- Additional Feature:Wax discharge port
- Additional Feature:Top-opening lid design
Seattle Pottery Supply 12×13 Electric Kiln Cone 6
The Seattle Pottery Supply 12×13 is a space-saving option for small-batch potters. Plug it into a standard 120V outlet, no rewiring needed.
Firing to Cone 6, a mid-range temperature, hits solid stoneware. The Bartlett V6CF controller? That’s your brain, setting ramps and holds so you’re not babysitting the dial.
A thermocouple offset from the box means swapping it out is a quick job. Since 1975, they’ve built these in the USA.
This kiln is best for a home studio potter who fires test tiles or small sculpture, not for someone throwing dozens of mugs a week. Its clear strength is plug-and-play convenience; you can run it in a garage or basement without calling an electrician.
The honest drawback is the tiny chamber, so you cannot stack large vases or fire tall ware in the same load. Compared to a larger 240V kiln, this one forces you to fire more often for the same output, which eats into your time.
The controller gives you repeatable ramp-and-hold schedules, so you can slow a glaze soak or speed a bisque fire with a few button presses. It differs from other kilns in this article by trading capacity for simplicity, making it the least intimidating entry point.
For a beginner, this unit removes the fear of wiring and ventilation upgrades, but you still need to check the manufacturer’s manual for clearances and outlet requirements. If you plan to grow your studio, treat this as a learning tool, not your final kiln.
- Max Temperature:Cone 6 (~2232°F)
- Power Source:Electric (120V)
- Control System:Bartlett V6CF digital controller
- Primary Application:Pottery, test kiln, lower production
- Chamber Size:12 × 13 in
- Safety Features:Thermocouple offset for easy, safe replacement
- Additional Feature:Made in USA
- Additional Feature:Easy thermocouple replacement
- Additional Feature:5-20 receptacle required
Small 1200°C Electric Kiln for Home Pottery
This little kiln suits home potters who need to fire test tiles, small batches of cups, or glaze samples without dedicating a full studio corner to the equipment. It reaches 1200°C (2192°F) using a 1500W element, so you can run bisque and glaze firings on a standard household circuit, but check the manufacturer’s instructions or an electrician before you plug it in.
The chamber is 5.9 x 5.9 x 7.9 inches, which gives you vertical room for tall mugs or stacked bowls while leaving your workbench clear. Its honest limitation is size: you cannot fire a large platter or a full set of dinner plates in one load, so plan for multiple small firings.
Choose the Semi-Auto version if you prefer to set the temperature directly and watch the ramp yourself. The Full-Auto adds firing-time settings for repeatable schedules, and both use the same clear digital panel, so the difference is only how much automation you want.
Ventilation openings near the controls help manage heat around the electronics, and the insulated chamber keeps heat where it belongs, which also keeps your electric bill lower. Stable feet and a carrying handle make it easy to move from a shelf to a classroom table, so it works for a teaching setup too.
Compared to larger studio kilns, this model trades capacity for convenience and portability. You get a reliable small kiln for everyday glaze testing, but you give up the ability to fire large sculptural pieces or production runs. From richigblosmum, it is built for daily home studio life, not for high-volume output.
- Max Temperature:1200°C (2192°F)
- Power Source:Electric (1500W)
- Control System:Semi-Auto or Full-Auto digital panel
- Primary Application:Pottery, ceramic pieces, classroom projects
- Chamber Size:5.9 × 5.9 × 7.9 in
- Safety Features:Ventilation openings; stable support feet; top handle
- Additional Feature:Top carrying handle
- Additional Feature:Stable support feet
- Additional Feature:Ventilation openings release heat
EQCOTWEA Electric Ceramic Kiln 4KW 1280°C
The EQCOTWEA is a high-fire powerhouse that fits on a workbench. It hits 1280°C, so it will melt stubborn glaze with zero fuss, and uniform heating means no more splotchy cups. This compact kiln is best for a home potter who wants to fire personal work or test tiles without waiting for a community studio slot.
Its clear strength is the small hexagonal chamber, which holds 35 dolls or 25 cups yet wastes less energy than a larger kiln. An honest drawback is the heavy electrical demand: it needs a dedicated 240V line with a 40A breaker, so you should call an electrician before buying. Unlike larger top-loading models, this one suits a workbench and skips the fancy digital controller in favor of simple dials.
You do not need an engineering degree to run it. Just set the dials, and it handles bisque firing, glaze sintering, or cone-testing tiles for you.
One limitation is that you will likely fire only a few mugs at a time because the chamber is compact. That trade-off keeps your electricity bill lower than a full-size kiln would. For a home studio upgrade, this beast delivers on heat and simplicity, but respect the cable requirement. For electrical or ventilation questions, follow the manufacturer’s instructions or ask a qualified electrician.
- Max Temperature:1280°C (working 1220°C)
- Power Source:Electric (220V, 4KW)
- Control System:Simple intuitive controls
- Primary Application:Bisque, glaze sintering, test tiles
- Chamber Size:0.95 cu ft (hexagonal tabletop)
- Safety Features:Heavy-duty heat-resistant structure; optimized heat dissipation
- Additional Feature:Hexagonal tabletop chamber
- Additional Feature:2P40A breaker required
- Additional Feature:Optimized heat dissipation
PYY Electric Pottery Kiln with PID Controller
The PYY Electric Pottery Kiln suits a home studio potter who wants a reliable, small kiln for firing pendants, small melts, or test tiles. Its clear strength is the PID controller, which keeps temperatures steady and remembers your settings after a power cut.
This kiln fires to 1200°C with 1500W and HRE elements, and the auto shut-off plus over-temp alarms let you walk away without worry. The honest drawback is the 5.9-inch cubed chamber, which limits you to small pieces, so you cannot fire a full shelf of mugs or a large vase.
Compared to bigger hobby kilns in this lineup, the PYY trades capacity for precision and portability, weighing just 39 lbs for easy bench placement. You get gloves and tongs in the box, and the UL certification covers the electrical safety basics.
Dialing in a glaze firing for glass fusing is straightforward, and the controls feel intuitive even if you are new to kilns. Unlike a wheel or clay body, this tool does one job well: consistent small-batch firing without the pricey fuss of a large studio model.
For any wiring or ventilation questions, check the manufacturer’s instructions or ask a qualified electrician before plugging it in. Just remember the chamber is a workhorse, not a warehouse, so plan your bisque loads around its compact size.
- Max Temperature:1200°C (2200°F)
- Power Source:Electric (1500W)
- Control System:PID controller with LCD display
- Primary Application:Clay, glass fusing, jewelry, metal melting
- Chamber Size:5.9 × 5.9 × 5.5 in
- Safety Features:UL certified; over-temp alarms; auto shut-off; gloves and tongs
- Additional Feature:HRE/MoSi2 heating elements
- Additional Feature:Power-off memory
- Additional Feature:Includes gloves and tongs
Factors to Consider When Choosing Pottery Kilns for Home Studios
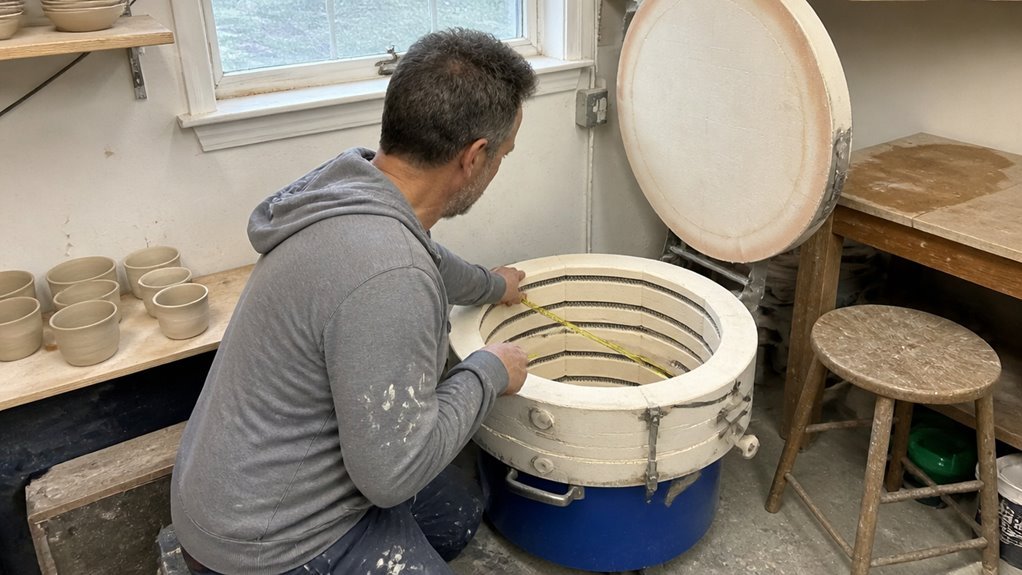
First, match the kiln to your home’s electrical supply. A 240V kiln can trip your breakers if the outlet isn’t rated for it, so check the panel before you buy.
Next, decide on the cone rating you actually need. Cone 6 handles most glazes well, while cone 10 adds cost for higher-temperature work.
Then choose the kiln size by measuring your studio space, not your wish list. A smaller kiln that fits your room beats a larger one you can’t use safely.
Look for a control system with a PID controller, which manages firing ramps automatically. Manual switches work, but they demand more attention during every firing.
Plan for ventilation and safety from the start. Your garage is not a sealed kiln, so follow the manufacturer’s instructions for airflow and, for any wiring or gas hookups, consult a qualified electrician or technician.
If you handle glazes or clay, always check the manufacturer’s safety sheets for silica dust and lead warnings. Never assume a fired piece is food safe without that guidance.
Matching Electrical Requirements
Check your electrical panel before you fall for a shiny kiln. The difference between firing pots and tripping breakers comes down to your home’s wiring.
Standard 120V circuits handle compact kilns. You will need a dedicated 20 amp breaker and a 5-20 receptacle with that sideways slot, not your usual outlet.
For bigger units, expect 220-240V with an 18.2A draw. That means a 40A breaker and thick 4mm² wiring, so call an electrician unless you enjoy sparks.
Always verify the kiln’s amperage against your panel’s capacity. Overloaded wiring is a fire hazard, not a vibe.
Microwave kilns skip this fuss, but your microwave needs at least 800W to fuse glass. Confirm the outlet type and breaker size before buying, since some kilns demand professional upgrades.
Know your panel first, then your pots. That keeps the focus on your throwing and glazing, not on electrical repairs.
Maximum Temperature Limits
Your kiln’s actual maximum temperature determines what you can fire, so check that number before anything else. Most home electric kilns top out around Cone 6, roughly 2232°F, which suits standard stoneware well.
If you only fuse glass or fire low-fire earthenware, 1000°C is enough. The rated maximum is not your safe working temperature, so leave a 30–60°C buffer to protect your elements and controller.
Pushing past the limit is a costly mistake. For porcelain vitrification, you need 1280°C or higher, plus a beefy circuit. For bisque and glaze sintering, 1200°C works.
Buy a kiln rated 100°C hotter than your hottest planned firing. Your wallet will thank you later.
Kiln Size and Capacity
Two factors decide your firing capacity: the interior chamber’s dimensions and its cubic-foot volume. Choose the smallest kiln that fits your tallest pot.
A 5.9 x 5.9-inch chamber suits small cups, while a 7.9-inch height lets you fire mugs. A 0.95 cu ft model holds about 25 cups or 35 test dolls per load, which covers most hobbyists.
Compact 12-inch footprints save bench space but slow down high production. Smaller chambers heat faster and draw less power, which helps when firing test pieces.
Larger interiors need more energy and longer cycles to reach temperature, so match the kiln to your actual work. Measure your tallest piece first, then buy the smallest kiln that clears it.
Your vertical clearance sets the real limit, so measure that height carefully.
Control System Features
You will spend more time with your kiln’s controller than with your clay, so choose it carefully. Basic controllers set temperatures up to 1200°C in 1°C steps, which works fine for simple bisque firing.
A PID controller adds a self-correcting heat system and a clear digital display, giving you repeatable results every time. It also includes power-off memory so a blackout will not ruin your piece, plus auto shut-off and over-temperature alarms.
Type-K sensors monitor the kiln reliably, and the digital panel is straightforward to read. Choose a semi-automatic model if you only need to set a target temperature.
A full-automatic controller lets you program firing durations, which helps with complex glazes. Look for models with adjustable ramp and hold times, so you can program the temperature curve step by step.
That control is the difference between guessing at a result and glazing with confidence.
Safety and Ventilation
Your kiln’s controller runs the firing, but the safety setup protects you and your studio. Place the kiln in a well-ventilated, fire-resistant area, since firing releases fumes that need serious airflow. Crack a window or install a dedicated vent hood.
Let the kiln cool completely before cracking the lid. Opening it early releases trapped heat and risks burns and thermal shock. Wear heat-resistant gloves before touching anything, because shelves stay dangerously hot for hours.
Plug the kiln into a grounded, dedicated circuit with the correct amperage breaker. Check your unit’s power draw, as a 120V model might need 15 amps. For wiring questions, follow the manufacturer’s instructions or hire a qualified electrician.
Keep flammable clutter away from the kiln. You are firing a tiny volcano, not roasting marshmallows.
Skimp on safety and your studio becomes a hazard. Prioritize ventilation and grounding, even on budget kilns.
Versatile Applications
A small kiln that reaches 1280°C opens up many firing options, and that is its real versatility. You can fire stoneware and porcelains past cone 6 without difficulty.
That temperature range also lets you test glazes and fire test tiles, so your experiments won’t turn into melted blobs. The 0.95-cubic-foot chamber holds about 25 cups or 35 dolls per load, which suits small batches well.
Digital controllers with 1°C resolution offer ramping and hold settings, which help with glass fusing and jewelry enameling. You can fire pots, but you can also explore other projects with the same kiln.
A 1500W element runs on standard 120V, so you likely won’t need to rewire your garage. For any wiring questions, check the manufacturer’s instructions or ask a qualified electrician.
This kiln is a dependable workhorse for all your firing needs.
Budget and Operating Costs
A kiln firing costs more than the electric meter shows. Entry-level models run $300–$1,500, and each firing adds $0.50–$2.00 to your power bill. A 1500W kiln running for two hours uses 3 kWh, about fifty-one cents at average rates.
Heating elements wear out every 100–200 firings. Replacing them costs $30–$100. Shelves, kiln wash, and thermocouples add $10–$50 per batch.
Higher-wattage units need a 20-amp circuit. That installation runs $200–$500, and for wiring questions, follow the manufacturer’s instructions or hire a qualified electrician.
Plan for annual maintenance at 10–15% of the purchase price. When you price a kiln, include the firing costs, not just the box. Your electric bill will thank you.

Flat, sturdy firing surface that also protects your kiln floor.

Witness cones confirm your cone 6 firings with visual proof.
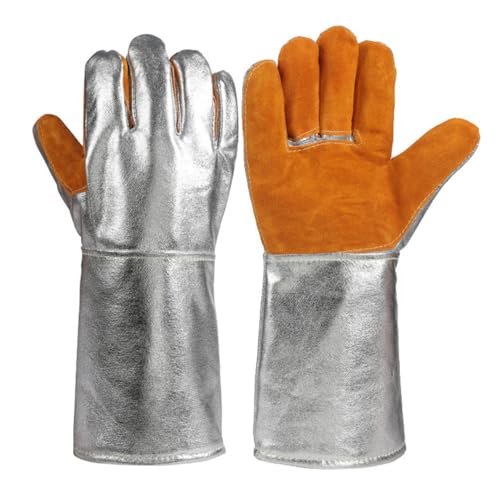
Heat-resistant hand protection for loading and unloading hot kilns.
Browse discountedKiln Accessorieson Amazon
Frequently Asked Questions
What Is the Best Way to Vent Fumes From a Home Kiln?
The best way to vent fumes from a home kiln is to install a dedicated powered downdraft vent that connects directly to the kiln’s exhaust port and routes air outside through a rigid duct. A simple open window or box fan is not enough, as it fails to capture low-level toxic gases before they spread through your space.
Look for a vent system rated for your kiln’s cubic feet per minute (CFM) output, and place the outside exhaust opening at least three feet from any window or door. For a concrete tip, test the airflow by holding a lit incense stick near the kiln’s lid seam; the smoke should pull downward into the vent.
This setup helps with fume extraction and also controls heat and humidity, which protects your kiln’s elements. If you ever smell odors in the house during a firing, check the duct connections for leaks and reinforce them with high-temp silicone.
For health worries, never bypass the vent for convenience, and if you feel dizzy or nauseous, stop firing and check with a vet or your doctor. In my experience, a consistent downdraft ventilation routine makes every firing safer and keeps your workspace breathable.
Can I Fire Pottery and Glass in the Same Kiln Session?
No, you cannot fire pottery and glass in the same kiln session because their required temperatures and cooling rates are too different. Glass needs a much lower peak temperature and a slow, controlled anneal, while pottery often demands higher heat that will cause glass to melt, bubble, or crack.
For a successful single firing, pick one material and stick to its full schedule. A concrete tip: if you try glass with stoneware, place the glass on a separate shelf and fire to the lower glass temperature, then accept that your pottery will be underfired and porous.
To keep both safe, run separate sessions, and use a pyrometric cone for pottery to confirm proper heat work. Always check your kiln’s manual for compatible firing cycles, and if your pet’s ceramic bowl is involved, check with a vet if you have any health concerns about glazes.
How Often Should I Replace Kiln Firing Elements?
You should replace kiln firing elements every 100 to 200 firings, though heavy use or overfiring can shorten that range. Watch for hot spots, slow heat-up, or visible wear, and swap them out promptly to avoid damaging your work.
Always keep a spare set of elements on hand so you can make the change without delaying your next project. A simple way to track lifespan is to log each firing in a notebook or app, which helps you predict replacement timing.
If you notice uneven glaze results or longer firing cycles, check the elements first before blaming your kiln’s controller. For any electrical concerns, turn off power and consult a qualified technician, and for health worries related to fumes or dust, check with your vet.
What Is the Safest Distance From Walls for a Kiln?
The safest distance from walls for a kiln is at least eighteen inches, and you should treat that as a minimum, not a suggestion. This clearance gives heat somewhere to go and stops combustible materials like drywall from reaching dangerous temperatures.
Check the manufacturer’s manual for your specific model, since some kilns require a larger clearance depending on their insulation and wattage. If your studio is tight, use a non-flammable ceramic fiber board as a shield and still keep the gap, because radiant heat can ignite dust or wood framing over time.
For a simpler rule, measure from the kiln’s outer shell, not the stand, and add extra space near any door or vent opening. Your pet’s safety matters too, so keep curious noses and paws away from the hot surface and the warm zone around it. If you ever see scorching or smell burning near the wall, stop firing and check with a kiln technician or your vet if your pet shows unusual behavior.
Do I Need a Dedicated 240-Volt Circuit for My Kiln?
Yes, your kiln absolutely requires a dedicated 240-volt circuit, just like any high-powered appliance. Sharing this circuit with other devices creates a serious fire hazard and will likely trip your breaker during every firing.
A dedicated line ensures your kiln gets consistent power without overloading your home’s electrical panel. For a safe setup, check your kiln’s manual for its exact amperage rating, then hire a licensed electrician to install a correctly sized breaker and outlet. This one step protects your equipment and your home.
Also, avoid using an extension cord for your kiln, even a heavy-duty one. Your electrician can verify the proper wire gauge and outlet type, such as a NEMA 6-50 plug, for your specific model. If you ever notice a burning smell or warm wires, stop firing immediately and consult a professional.
Rounding Up
Pick the right kiln by balancing your budget, your space, and the cone you need to fire.
Check the PYY with PID controller for about $400 if cone 6 consistency matters more than size. Measure your corner before choosing the 12×9 Seattle model, because its small lid will make you curse every load.
Compare that against the 12×13 Seattle unit at $650, which gives you pro results without pro headaches. Write down your firing schedule and confirm it matches cone 6 before you buy.
Your first kiln won’t be your last, so don’t overthink it. Buy the 12×13 Seattle and start firing.